Basil Coconut Ice Cream
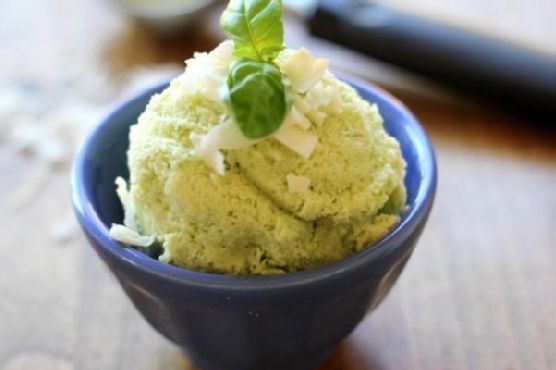
Basil Coconut Ice Cream is a dessert that serves 8. One portion of this dish contains roughly 3g of protein, 23g of fat, and a total of 283 calories. For $1.08 per serving, this recipe covers 7% of your daily requirements of vitamins and minerals. This recipe from Foodista requires basil leaves, salt, honey, and half & half. It will be a hit at your Summer event. 5 people were impressed by this recipe. It is a good option if you're following a gluten free, lacto ovo vegetarian, and primal diet. From preparation to the plate, this recipe takes roughly 45 minutes. All things considered, we decided this recipe deserves a spoonacular score of 28%. This score is not so amazing. If you like this recipe, you might also like recipes such as Coconut And Thai Basil Ice Cream Best Lick! 2008 Ice Cream C, Janine's Blueberry Basil Ice Cream Best Lick! 2008 Ice Cream, and Roasted Strawberry Coconut Milk Ice Cream (Vegan) + Tips for Making Your Homemade Ice Cream Soft.


Directions
- Step 1 : Heat coconut milk and cream on the stove over medium high in a saucepan until hot and barely bubbling (bring to a low boil).
- Step 2 : Add honey and salt; mix to dissolve.
- Step 3 : Add basil leaves, stir and allow them to wilt in the mixture; remove saucepan from heat.
- Step 4 : Pour mixture into a blender and emulsify until completely creamy and no chunks of basil are visible (if this is not possible in your blender you can strain out the basil pieces with a fine wire strainer/colander if you would like or you can leave the basil pieces in the mixture). Allow mixture to cool 20 minutes; this allows the flavors to infuse.
- Step 5 : Pour mixture in a large container and refrigerate a few hours until cool.
- Step 6 : If using an ice cream maker, follow the instructions on your ice cream maker accordingly (the one I used sits on the counter. You just plug it in, turn it on chill mode, allow the built-in bowl to get cool, then pour in the ice cream mixture. You then turn on the churn setting and turn the timer on for 25 minutes. It works its magic and you have wonderful ice cream by the time dinner is consumed).
- Step 7 : You can also try this without an ice cream maker by putting the mixture in a freezer-safe container and stirring with a spoon every hour for roughly 8 10 hours. If you try this without an ice cream maker, small ice crystals will form and the consistency will not be as creamy as youd get when using an ice cream maker, but it will still be damn delicious!
- Step 8 : Side note: We had leftovers when I made this and we froze them in a Tupperware container. The ice cream gets to be frozen solid so when you go to eat the leftovers, make sure you thaw the ice cream at least 10 minutes before attempting to dig in.
-
 Vegetarian